|
|
||
|---|---|---|
| resources | ||
| Check_10BaseT1S_Comet_AE02.vs3 | ||
| Check_10BaseT1S_Comet_AE02_1920x1080.vs3 | ||
| README.md | ||
README.md
10-Base-T1S Demos
Check_10BaseT1S_Comet_AE02.vs3
Showcase
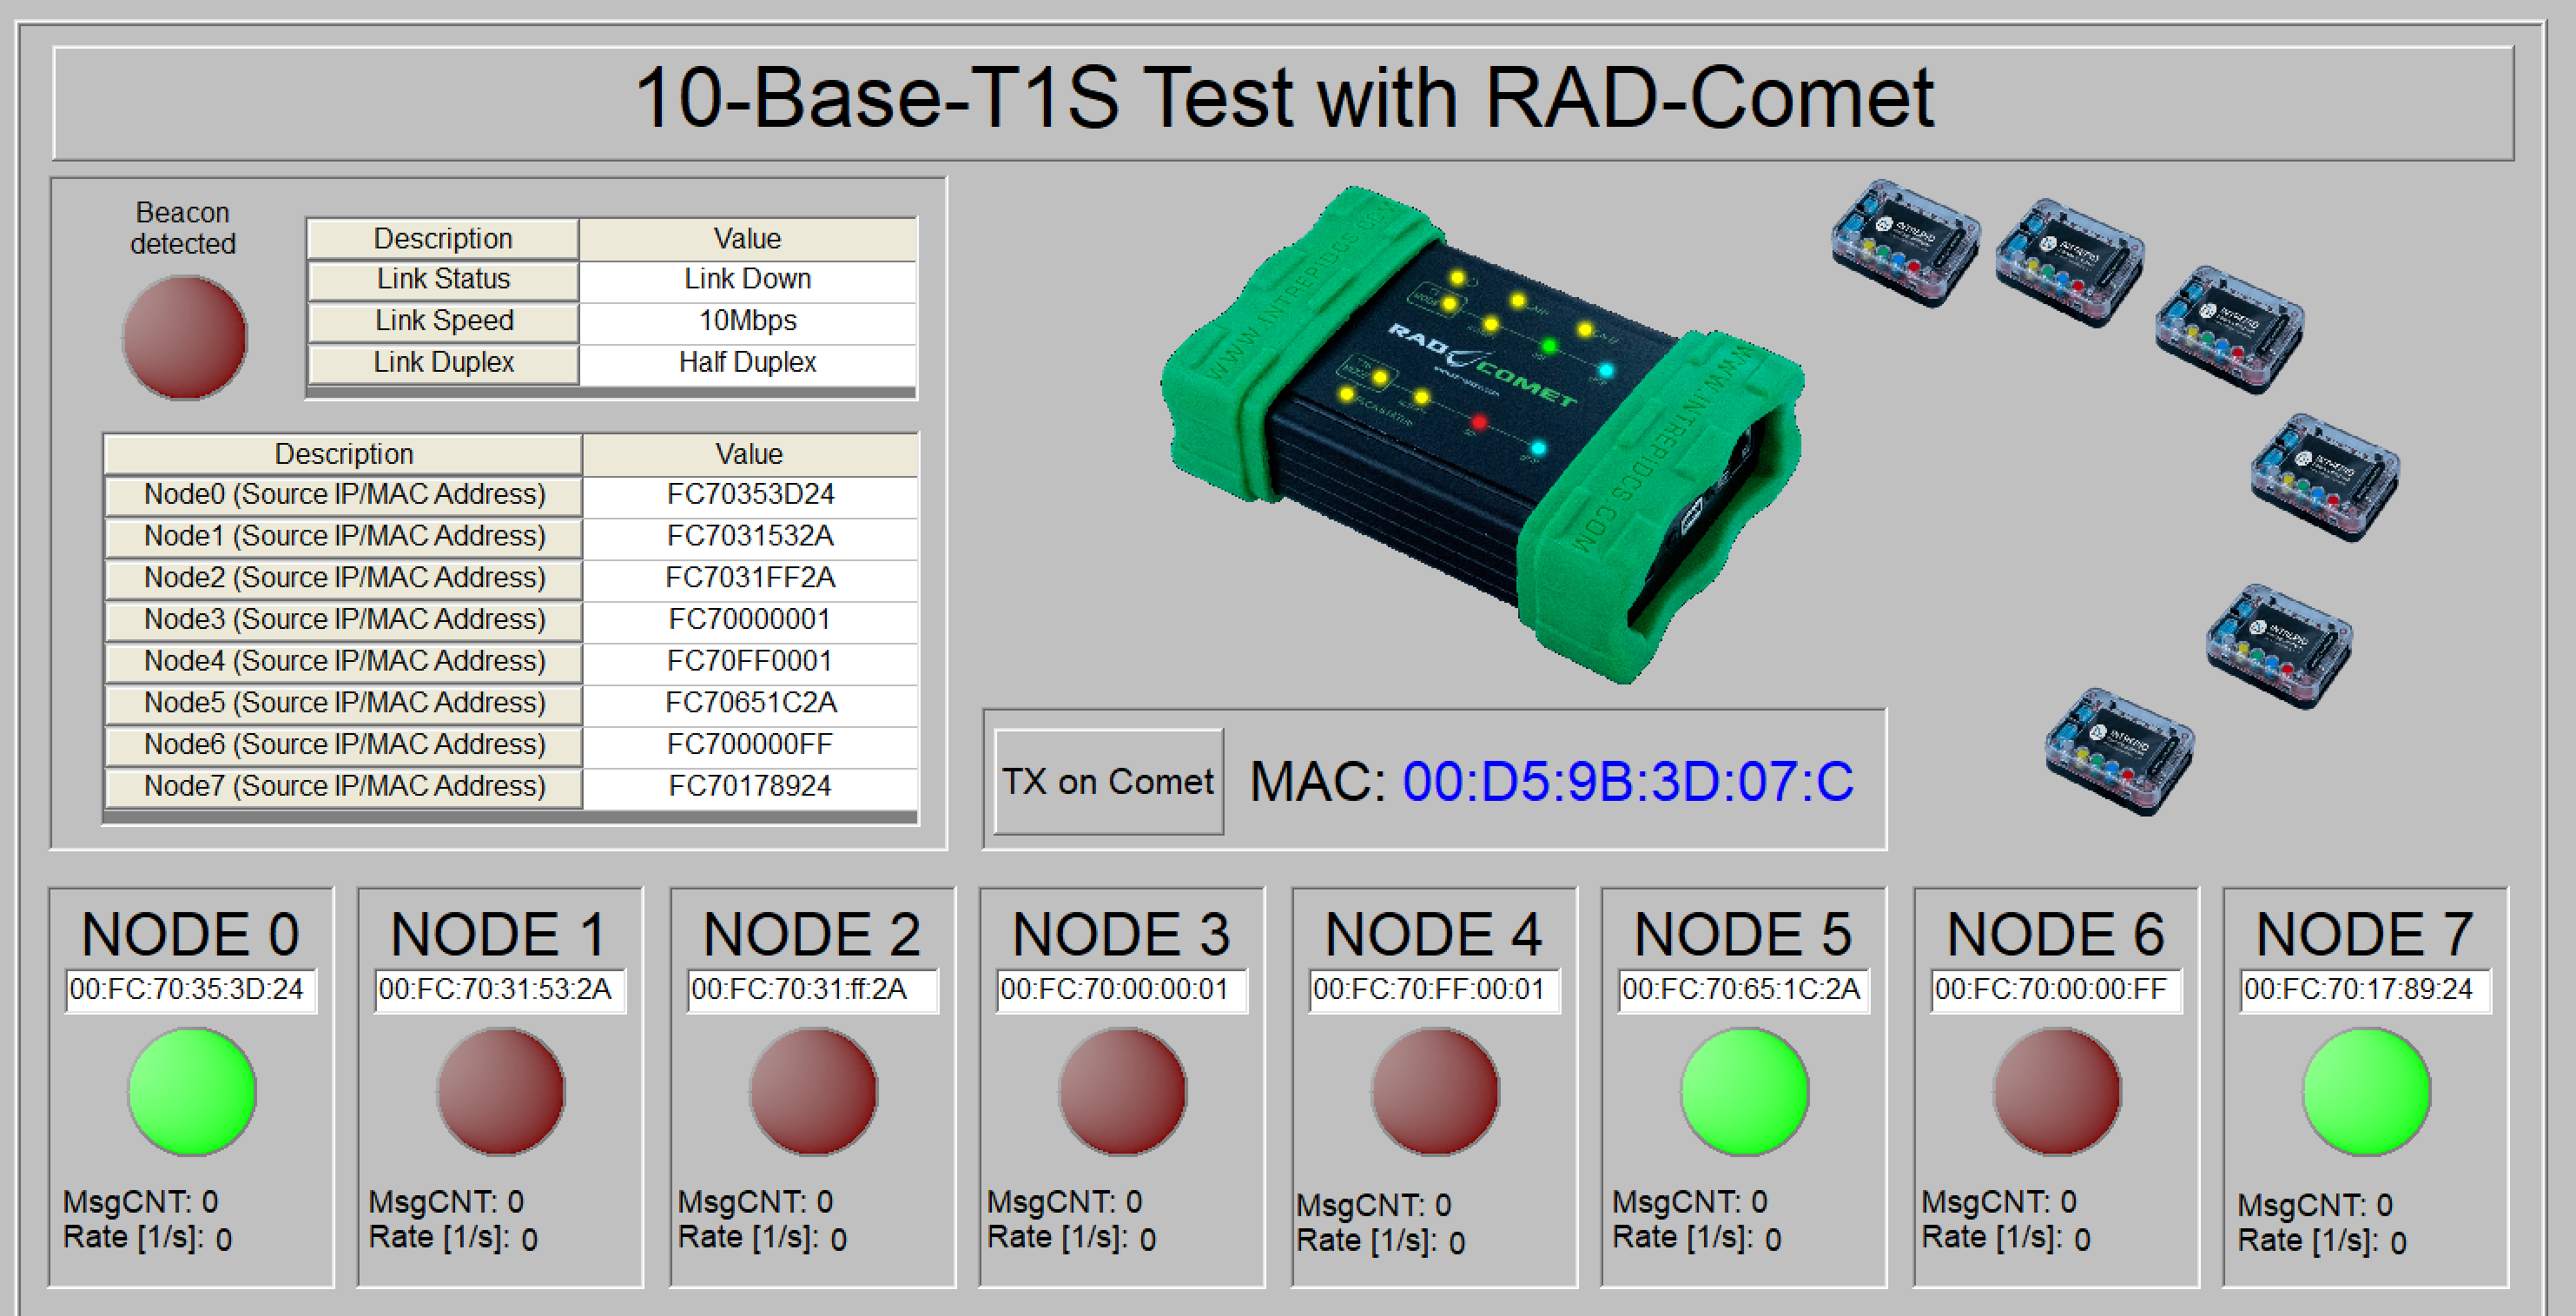
This setup was used with RAD-Comet The received messages are filtered by MAC address. Depending on the filtered message the graphical panel shows from which "node" the data was received. New setups for RAD-Comet2 and RAD-Comet3 also will
Requirements
- RAD-Comet - setup was build with RAD-Comet1
- 10-BaseT1S - Local ID=0
- several RAD-Meteor including USB-C cable
- set with individual local IDs
- Cabeling to connect RAD-Meteors and RAD-Comet
- iX to Pigtail cable
- mating terminal blocks for RAD-Meteor TBP02P1-381-02BE
- USB-powersupply for x-RAD-Meteor
Used Vehicle Spy version
Beta 3.9.19.3
Setup
- Connect RAD-Comet 10-Base-T1S port to several RAD-Meteor
- Power the RAD-Meteors via USB
- Connect RAD-Comet via USB-C to the PC
Usage
- Open the setup and check the RAD-Meteors MAC addesses in the AE02 network settings.\
- Go online with Vehicle Spy. \
- To start the individual nodes, press the yellow button and start "run".